Fault Analysis and Treatment of Oil-Immersed Transformers

Oil Leakage at Welded Joints
Oil leakage at welded joints primarily stems from poor welding quality, such as incomplete or detached welds, and defects like pinholes and gas pores. Although oil-immersed transformers are initially coated with solder and paint during manufacturing, potentially masking these issues temporarily, the defects tend to surface during operation. Additionally, electromagnetic vibration can cause weld cracks, leading to oil leakage.
To resolve such leaks, the first critical step is accurately locating the leak point. For severe leaks, temporary control can be achieved by riveting the leak point using metal tools like a chisel or punch. Subsequently, the affected area must be thoroughly cleaned, and a high-molecular composite material should be applied for sealing, achieving a long-term, reliable repair.
Oil Leakage at Seals (Gaskets)
Poor sealing commonly occurs at the joint between the transformer tank and cover. This area is typically sealed using rubber rods or gaskets. Improper installation, such as uneven compression, misalignment of the seal, or using inappropriate materials (e.g., plastic tape instead of dedicated seals, or simply pressing the ends together directly), can all lead to inadequate sealing and create leak paths.
An effective solution is to bond the joint with Foshilin (Vaseline) material, forming a robust, leak-proof structure. If feasible, bonding the metal housing itself can further enhance the sealing effectiveness.

Oil Leakage at Flange Connections
Leakage at flange connections is often caused by an uneven flange surface, loose fastening bolts, or incorrect installation methods, resulting in insufficient bolt preload and ineffective sealing.
The remedy involves first tightening all loose bolts and strictly adhering to the specified torque procedure. Simultaneously, inspect all potential leak points (especially bolt connections) to ensure they are all properly addressed, achieving comprehensive leak control.
Oil Leakage at Bolts or Pipe Threads
Rough handling during the manufacturing of oil-immersed transformers or inadequate sealing treatment of threads can lead to oil leakage at bolts or pipe threads after a period of operation.
High-molecular sealing materials can be directly applied to the bolts to control the leak. Another effective method is: remove the bolt (or nut), apply Vaseline (Foshilin) as a release agent on the thread surface, then coat with a sealing material, reinstall and tighten to the specified torque, and allow the sealing material to fully cure, achieving the desired sealing effect.
Oil Leakage in Cast Iron Components
Oil leakage in cast iron components is mainly caused by casting defects (such as sand holes) or cracks developed during operation.
- Crack Leakage: To prevent crack propagation, the best method is to drill a stop-hole at the end of the crack to relieve stress. During repair, an oil引流line can be inserted into the crack, or the crack edges can be gently tapped with hand tools to close it. Subsequently, the leak area must be thoroughly cleaned with acetone and coated with a high-molecular composite sealing material.
- Sand Hole Leakage: For cast iron parts with sand holes, direct sealing using high-molecular materials is a simple and effective repair method.
Oil Leakage in Radiators (Coolers)
Oil leakage in radiators frequently occurs at the bends and welded joints of the cooling tubes. This is primarily due to residual stresses generated during the tube bending and stamping processes, where the outer wall is under tension and the inner wall under compression, making stress-concentrated areas prone to cracks or weld failures.
During handling, the butterfly valves at the top and bottom of the radiator should be closed first, isolating the oil within the radiator from the main oil tank, thereby reducing internal pressure and minimizing leakage. Once the leak point is confirmed, necessary surface preparation should be carried out, followed by sealing and repair using Foshilin (Vaseline) material.
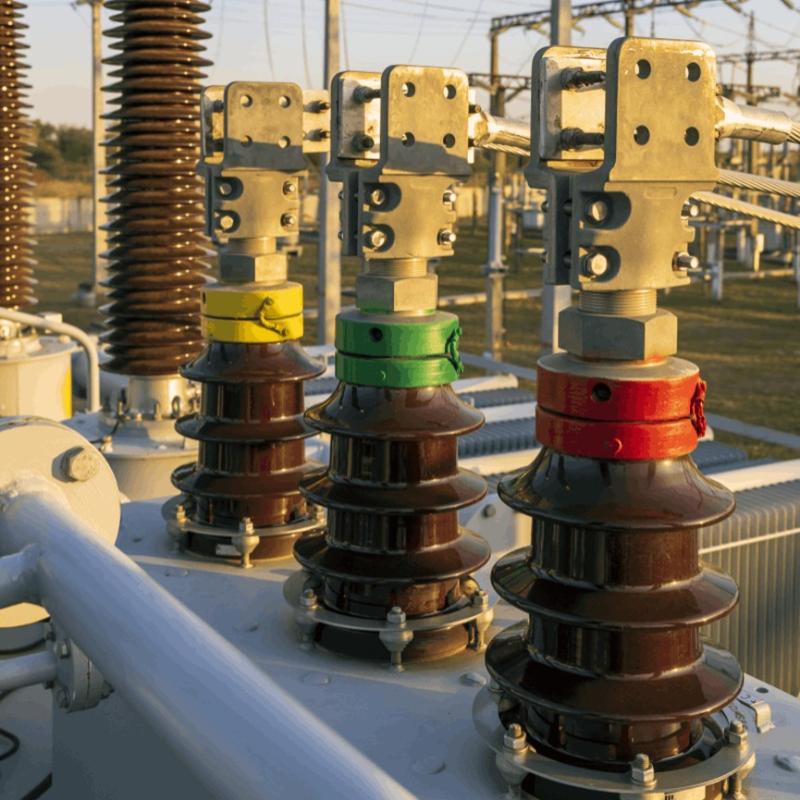
Oil Leakage at Porcelain Bushings and Glass Oil Level Gauges
Such leaks are typically caused by improper installation (e.g., uneven force, excessive compression) or aging and failure of the sealing components.
High-molecular composite materials, due to their excellent bonding properties, can effectively adhere to various materials like metal, ceramic, and glass, providing a comprehensive and reliable solution for addressing various oil leakage problems in oil-immersed transformers.

-
SVR - High Voltage Feed Voltage Regulating Transformer(distribution transformer)

-
Single Phase Automatic Voltage Regulator – 7.62 kV 13.8 kV 14.4 kV 19.92 kV 34.5 kV IEC 60076 compliant for Power Industry

-
Automatic Tap - Changing Voltage Regulator – 7.62 kV 11kV 13.8 kV 14.4 kV 19.92 kV 34.5 kV, IEEE compliant for Power Industry

-
6.35kV 13.2kV 14.4kV 22kV 33kV Oil-immersed self-cooled induction voltage regulator source manufacturer